Sunday, September 30, 2012

Simply Sinful Cinnamon Muffins

I made these muffins because I wanted something for breakfast for dinner but I probably wouldn't usually eat these muffins for breakfast. They were really yummy and probably too sweet for breakfast.


There's their version of it. Here's mine.
Mine totally look like theirs!!! Well, one little oops that made them not as pretty. I stuffed them too full. The cinnamon part of the muffin bubbled out a little and actually burned on the muffin pan. That was fun to clean up! Next time (and I believe I'd make these again) I'll make sure to put the cinnamon filling closer to the bottom.


Here's the recipe:
Simply Sinful Cinnamon Muffins
Topping
1/3 cup brown sugar, packed
1/4 cup diced pecans (I didn't have any so I didn't put any in)
1/4 cup rolled oats
1/2 cup King Arthur Unbleached All-Purpose Flour
3 tablespoons soft butter

Filling
1/2 cup Baker's Cinnamon Filling mix*
3 to 4 tablespoons water

*Or substitute 3 tablespoons butter, 1/2 cup brown sugar, and 1 1/2 tablespoons ground cinnamon for the Baker's Cinnamon Filling mix and water.

Batter
1/2 cup (1 stick) butter, melted
3/4 cup milk
2 large eggs
1 3/4 cups King Arthur Unbleached All-Purpose Flour
1/2 cup rolled oats
2 tablespoons Signature Secrets(r) Culinary Thickener or cornstarch
3/4 cup granulated sugar
1 tablespoon baking powder
1/2 teaspoon salt
1/4 teaspoon ground nutmeg
1/2 cup cinnamon chips or butterscotch chips (I didn't have any)
Preheat your oven to 400°F. Line a 12-cup muffin pan with cupcake papers, or grease it lightly.

Prepare the topping by mixing the ingredients together until crumbly. Set aside. 

Prepare the filling by mixing the Baker's Cinnamon Filling with enough water to make filling with a soft, pudding-like consistency. Set it aside. 

To make the batter: In a large bowl, whisk together the melted butter, milk, and eggs. In a separate bowl, whisk together the dry ingredients, including the chips. Add the dry mixture to the liquid, stirring just until combined.
Divide half the batter evenly among the muffin cups. Dollop 2 teaspoons cinnamon filling onto each muffin, then top with the remaining batter. Sprinkle with topping, pressing it in lightly.

Bake the muffins for 20 to 25 minutes, or until they're golden brown. Remove them from the oven, and wait 5 minutes before transferring them from the pan to a rack to cool. Yield: 12 muffins.

Monday, September 10, 2012

Preparing for the Baby - Freezer Meals

In anticipation of baby #4, I spent a good portion a couple weeks ago of planning, buying, and preparing food. I made a total of 20 dinners (some were doubled). All were new recipes (except for a couple lasagnas) so hopefully they're good! If not, I didn't double too many of them. Here's my stash!

And here are all the links to all the recipes I made (except my lasagna).

Healthy Mama BBQ Chicken and Chicken Curry

Baked Chicken Penne

Honey Rosemary Chicken, Lime Salsa Chicken, and Santa Fe Chicken

Parmesan Chicken Bake

Roasted Red Pepper Enchiladas

Chicken Fajitas

Cheesy Chicken and Wild Rice Casserole

Italian Turkey Soup

Black Bean Taco Soup

Slow Cooker French Dip Sandwich

Crockpot Chicken Tortilla Soup

Saturday, August 4, 2012

Chore Chart

There are a lot of great ideas for chore charts out there. I loved seeing a list of things kids could do by age. I never know if I'm expecting too much of my kids or not expecting enough. I think that kids don't do a lot of work around the house or they are too easily rewarded. I saw this list on Pinterest and thought it was a good way to evaluate how my kids were doing.


Source: scribd.com via Tiffany on Pinterest

Here was another list that helped too.

What helped was that I could never think of things for them to do! There were the normal ones like getting dressed, brushing teeth, making your bed, and cleaning up your toys but I couldn't think of other things. Then, here was a list of tons of things that my kids could do ... because these lists said they could do it! :) One thing I discovered in all this, kids can do more than you think they can do! I let Landon and Cody sort the laundry and then asked them to fold their clothes. Landon was able to fold all of his clothes! I was shocked. I don't know why but I just didn't think that he could do it! Another thing we did was buy a little vacuum for the boys. It doesn't suck very well but it was only $20, it's light, and they LOVE to vacuum! I made up my own chore charts for the boys. I decided they needed some reward system but I didn't want it to be money, toys, or treats (food). I decided that for every 10 smiley faces (we use smiley faces instead of x's or check marks), they could watch a tv show. That way, if they didn't get their chores done, who cares! They don't watch tv that day! If anything, it's harder on me than on them. If they do more chores, they get extra smiley faces. It's a win win for me I think!
For Cody's chore chart, I did pictures since he doesn't read yet. For Landon, he has words since he can read most of them. If you can figure out what the pictures are for Cody's, then I'll be impressed!

Olive Garden Chicken and Gnocchi Soup

Whenever I go to Olive Garden, instead of getting the salad (I'm not a huge fan anyways) I'll get the soup. And the soup I get is their Chicken and Gnocchi Soup. It is AMAZING! Love it! If you haven't tried it, do it next time! When I saw this recipe online I was so excited to try it but I was trying to not get too excited since, you know, stuff doesn't always taste as good all the time. I know it's the summer time but we were having some monsoon rains that week and I thought it'd be perfect to make a soup.


Source: copykat.com via Tiffany on Pinterest

Doesn't that just look a little yummy? And that's the only picture you get because for some reason, I guess I was too busy making it and dreaming of how good it was going to taste to take any! I've made this twice already and made a double batch the last time so I could freeze it for another day. Now we'll see how it freezes!


Olive Garden Chicken Gnocchi Soup

Author: CopyKat Recipes
Recipe Type: Soup
Prep time: 15 min
Cook time: 20 min
Serves: 8


Ingredients
  • 1 tablespoons extra virgin oil

  • 4 tablespoons butter

  • 4 tablespoons flour

  • 1 quart half and half

  • 1/2 cup celery, finely diced
  • 1 cup onion, finely diced

  • 2 minced garlic cloves

  • 2 14 ounce cans of chicken broth if you enjoy thick soup, use one can

  • 1 cup carrots, finely shredded
  • 1 cup chicken breasts, cooked and diced (you can use a rotisserie chicken)


  • 1 package gnocchi, cooked  (you can find these in gourmet/pasta section of the grocery store - you may want to cut the gnocchi in half if it is large, or purchase the mini size if available)

  • 1 cup of fresh spinach coarsely chopped
  • 1/2 teaspoon salt
  • 1/2 teaspoon thyme

  • 1/2 teaspoon parsley
  • 1/4 teaspoon nutmeg (optional)
Instructions
Saute the onion, celery, and garlic in the butter and olive oil over medium heat until the onion becomes translucent. Add the flour and make a roux. Let the butter and flour mixture cook for about a minute before adding 1 quart of half and half.
Cook gnocchi according to package directions.
Into the roux, add in the carrots and chicken. Once the mixture becomes thick, add the chicken broth. Once the mixture thickens again, add the cooked gnocchi, spinach, and seasoning; simmer until soup is heated through.  Before serving season to taste by adding additional salt.


Smoothies

There are a lot of ideas on Pinterest to make your own quick smoothies. Here was one idea I saw and then I added to it a little bit. It was easy enough. Freeze some plain/greek yogurt in ice cube trays, put 2-3 of them in a bag with about 1 cup fruit, and then add juice. I added about 1/2 cup of spinach to ours. These were for John to make in the morning. FYI, he tried them with milk first and they were not good! He said with juice it was a lot better! I was thinking you could also do any flavored yogurt and it'd be even yummier!


Healthy and delicious? Hard to come by!

Friday, July 27, 2012

Homemade Pizza Hut Pizza

Playing catch up is so hard! I made this Pizza Hut pizza quite a while ago during the winter. It was pretty good except for the fact that I cooked it a little too long! Oops!

That's their beautiful picture of their pizzas.
And there's mine. Sort sad huh?

As always, you can click on the link or I've copied it here for you. The only thing they didn't have was how long to cook it for! I think I cooked them for about 19 minutes and noticed they were getting over cooked! Sad! So let me know if you know how long you're really supposed to cook these for. I'm guessing between 12-15 minutes.

INGREDIENTS:

1 1/3 cup warm water (105 degrees F)
1/4 cup non-fat dry milk
1/2 teaspoon salt
4 cups flour
1 tablespoon sugar
1 package dry yeast
2 tablespoons vegetable oil (for dough)
9 ounces vegetable oil (3 ounce per pan)
butter flavored cooking spray
***Sauce***
1 can (8 ounce size) tomato sauce
1 teaspoon dry oregano
1/2 teaspoon marjoram
1/2 teaspoon dry basil
1/2 teaspoon garlic salt

DIRECTIONS:

Put yeast, sugar, salt, and dry milk in a large (2 qt.) bowl. Add water and stir to mix well. Allow to sit for two minutes. Add oil and stir again. Add flour and stir until dough forms and flour is absorbed. 

Turn out on to a flat surface and knead for about 10 minutes. Divide dough into three balls. In three 9" cake pans, put 3 Oz. of oil in each making sure it is spread evenly. Using a rolling pin, roll out each dough ball to about a 9" circle. Place in cake pans. 

Spray the outer edge of dough with cooking spray. Cover with a plate. Place in warm area and allow to rise for 1 to 1 1/2 hours. 

Sauce: 

Combine ingredients and let sit for 1 hour. 

For Each Nine Inch Pizza: Preheat oven to 475 degrees F Spoon 1/3 cup sauce on dough and spread to within 1" of edge. Distribute 1 1/2 Oz. shredded mozzarella cheese on sauce. Place toppings of your choice in this order: Pepperoni or Ham Vegetables Meats (cooked ground sausage or beef) Top with 3 Oz. mozzarella cheese Cook until cheese is bubbling and outer crust is brown.

Roasted Garlic Pasta Salad

So my sister told me about a blog she's been visiting to get her dinners and I've gotta say ... it seems like a great site! My goal this summer has been to eat healthier, "lighter", summer meals that don't bust the bank! This blog is really nice because she puts how much the meal is going to cost you. Well, about how much since prices change of course. Her blog it budgetbytes.blogspot.com.
For dinner last night, I made her Roasted Garlic Pasta Salad. It was really good! Now, I've been trying to get my whole family to eat more veggies and this salad was perfect for it. The ricotta cheese created a nice creamy sauce that wasn't overpowering. I am not a fan of tomatoes (nor anyone else in the family) so this was hard for me. I've been forcing myself to eat tomatoes for quite a few years so I've gotten better. I was the only one who ate them quartered up in the salad. We actually removed the tomatoes and blended them and put them back in for everyone else. My hubby said it made for great leftovers for lunch. Now, without further ado, the recipe.


Servings Per Recipe: 8 (about 1.25 cups each) 
Prep time: 10 min. Cook time: 20 min. Total: 30 min. 

3 Tbsp Garlic
1/2 Tbsp Olive Oil
1 lb. Pasta Shells
15 oz. Ricotta Cheese
1/4 cup grated parmesan
1 pint Cherry Tomatoes
3 cups Baby Spinach
Salt and Pepper to taste

STEP 1: Place the garlic in a small bowl or dish and drizzle 1/2 tablespoon of olive oil over the exposed cloves. Cover the bowl with an inverted plate. Microwave on high, in one minute increments, until the garlic is soft and fragrant (about 2 minutes) I minced garlic and it was done in 1 minute. Use caution when touching the dishes, they will be very hot. Allow the garlic to cool.

STEP 2: Bring a large pot of water to a rolling boil, add the pasta, and cook for 7-10 minutes or until al dente. Reserve 1/2 cup of the starchy pasta cooking water.

STEP 3: While the pasta is cooking, add the minced garlic to a medium bowl along with the ricotta cheese, a healthy dose of freshly cracked pepper, and about 1/2 tsp of salt. Add the 1/2 cup of hot, starchy pasta cooking water. Stir until it forms a smooth sauce.

STEP 4: Drain the pasta. Return the drained pasta to the warm pot (the burner should be turned off). Add the fresh baby spinach and pour the ricotta sauce over top. Slice the cherry tomatoes and add them to the pot as well. Stir until everything is well mixed. Add in the parmesan cheese and stir again. Taste and add salt and pepper to taste. Serve warm!


http://budgetbytes.blogspot.com/2012/05/roasted-garlic-pasta-salad-853-recipe.html

Wednesday, July 25, 2012

Shred Chicken

I read on pinterest a tip on shredding chicken. All you have to do is cook your chicken, stick it in you kitchen aid with the paddle attachment on, and turn it on. I did a whole flat of chicken and it came out great. It was so much better than shredding it using 2 forks like I usually do. Here's proof that it works!

Monday, July 23, 2012

Split Pea Soup

Maybe not my best idea ever but I decided to start eating healthier in January and I also got pregnant at the same time. Eating healthier wasn't the problem. It was trying something new while you're in that first pregnancy stage where things don't always agree with you. That was this split pea soup. It was not good for me because the house smelled for days afterwards and I did not like the smell!! 
Here's the link to the recipe. I know it doesn't look appetizing but I bet if I wasn't pregnant it would have been better! 
I know, it looks gross but really good for ya!
First kid didn't mind it. I did what my friend did and put it on homemade whole wheat bread.
Other kid did not touch it. He was not happy with this meal at all! Can you tell?

Sunday, June 3, 2012

Gyros

I know, I know, I start this blog and then don't post anything in like forever. Really, no one really reads this blog too much so it's all good! I had all these awesome recipes I was going to try in February and then I got pregnant!! So much for trying new foods! Everything sounded awful! So I will attempt to "catch up".
I made some gyros for the first time ever and they were SOOOOO good! We're not the best vegetable eaters so for everyone to eat all of their tomatoes and cucumbers, it was basically a miracle. What I liked the most about this recipe is that you can prep a lot of the food beforehand so making is was a cinch. It was ready in about 10 minutes once we decided it was time to eat. Plus, it was really light and perfect for a nice summer day. I HIGHLY suggest this recipe and I don't do that a lot. This is going into our dinner rotation.
I forgot to take any pictures (umm, I may have eaten mine a little too fast) so I've attached the picture and will provide the direct link to the person's blog who made these. Also, I doubled the recipe (did not do so in the recipe below) and it will make 6 gyros.

Yogurt-Marinated Chicken & Creamy Greek Sauce
Makes 1 to 2 pitas

For the marinade
1 large chicken breast (about 1/2 pound)
1/2 cup plain, whole milk yogurt (for the life of me I could only find nonfat and it was still great)
2 tablespoons olive oil
1 teaspoon dried oregano
1/2 teaspoon kosher salt
Freshly ground black pepper, to taste

For the Greek sauce
4 tablespoons mayonnaise (regular or light)
1 tablespoons milk
1 tablespoon cider vinegar
3/4 teaspoon sugar
1/8 garlic powder
Squeeze of lemon juice
Kosher salt and freshly ground black pepper

For the chicken
2 tablespoons olive oil
2 large garlic cloves, peeled and smashed
1/2 teaspoon dried oregano
1 tomato, diced
1/2 cucumber, diced
Pita bread, for serving 

For the marinade, cut the chicken breasts into bite-sized cubes. In a medium-sized bowl, whisk the yogurt, olive oil, oregano, salt, and pepper until combined. Add the chicken and marinate for at least two hours, but overnight if possible.

For the Greek sauce, mix together all of the ingredients and refrigerate. Adjust seasoning according to taste before serving. (Note: I used 1/4 teaspoon salt and a very generous amount of black pepper. You can't have too much in my opinion.)

For the chicken, wipe off the excess marinade. Heat the olive oil in a large skillet over medium-high heat. Add the garlic and oregano, and cook until fragrant and golden, about 2 minutes. Remove the garlic. Add the chicken and cook for 3 minutes without stirring. Give a quick toss and continue cooking for another 3 minutes, or until the chicken is cooked through.

To assemble, combine the chicken with desired amount of Greek Sauce, tomatoes, and cucumbers. Add salt and pepper to taste. Pile onto a piece of pita bread, fold like a taco, and devour.

The Link directly to her blog: http://www.thekitchn.com/lunch-recipe-yogurt-marinated-chicken-creamy-greek-sauce-167581

Wednesday, January 25, 2012

Homemade Baby Wipes

I'm running out of wipes. The normal thing to do would be to go and pick some up but I don't have a Costco membership anymore and they're just so expensive. I ran across multiple pins on how to make your own. And the only thing I was missing was the paper towels. While I was out at Target yesterday, I picked up the recommended Bounty paper towels. Let me tell you, this was so easy to make.
Here are the ingredients:
1/2 roll Bounty Paper Towels (I used the bigger size too)
2 TBS Baby Wash
2 TBS Baby Oil
2 1/2 cups warm/hot water
That's it! I ended up cutting my paper towels into 4ths because I didn't have a container big enough to do 1/2 a paper towel roll.
Directions:
1) Cut your paper towel in half (or fourths like me!). I used an electric knife. It was still hard but it worked better then just trying to use a normal knife.
2) Put your paper towel roll in the container you're using.
3)Heat up you water (I stuck mine in the microwave).
4) Put your baby oil and baby wash in your water and gently stir.
5) Pour the water mixture over the paper towel.
6) Seal the container and flip it over for 5 minutes.
7) Take the cardboard piece out of the center and you're done!
Disclaimer: I just made these today and as of right now, I have not even changed Carly's diaper so I have not tried them out. If these totally suck, I'll let you know!!!

Sunday, January 22, 2012

Cheesy Garlic Biscuits

I LOVE (and by love I mean I will eat a whole dozen) the biscuits from Red Lobster. They are sooooo yummy! When I saw this recipe from Pinterest, I had to give it a try. We both loved them. Am I saying the word love too much? The only problem I had with them was there was too much salt in the topping and I can't figure out how to make sure that the bottom of the biscuits isn't too crunchy. Otherwise, they were great! The hubby kept eating them and was happy/upset that I'd made them. He's trying to watch what he eats!
Here's what these biscuits look like. Mmmmm, I need to get me some more Bisquick so I can make these again!

Cheesy Garlic Biscuits Recipe
Makes 12

1 1/2 cups Bisquick
1 1/2 cups shredded cheddar cheese
1/2 cup milk
2 tbsp butter
1 tbsp oregano
3/4 tsp garlic salt

1. Preheat your oven to 400F. Spray a cookie sheet with non-stick spray.
2. Put biscuit mix, cheese and milk in a bowl and mix well to form a sticky dough.
3. Using a spoon, drop lumps of dough onto the cookie sheet. Bake for 10 min.
4. In a bowl, melt butter and mix with oregano and garlic salt (this is where I'd use less garlic salt because they seemed just a little too salty)
5. When the timer goes off, take them out and brush with butter mixture and bake 5 min. at 400F and another 5-6 min. at 350F.
6. Transfer into a plate and serve immediately.

Again, these were really good and different then just eating a slice of breath with butter. Sooo much better than that!

Wednesday, January 11, 2012

Oven Baked Parmesan Seasoned Fries


Posted as one of the best fries ever (well, that's implied in the post), I had to make them. I had all the ingredients on hand and was making pulled-pork barbecue sandwiches for dinner. Perfect. Plus, I like when you leave the peels on the potatoes. Not only are the peels good for you but that means I don't have to peel them!!! Also, these fries are baked, not fried! They're way more guilt free than those you'd buy and eat at say ... McDonalds. Just don't tell your husband that they're "good for you" or "healthy" though! :)

Oven Baked Parmesan Seasoned Fries

NOTE: The amounts listed are for every one pound of fries. One pound of fries is the equivelant of appoximately 3 medium potatoes. (I just double or triple the recipe to fit within my needs).

Ingredients:

1 pound of medium russet potatoes (approx 3 medium potatoes)
1 1/2 TBSP of Extra Virgin Olive Oil
1/4 tsp Dried Thyme
1/4 tsp Dried Oregano
1/8 tsp Dried Rosemary
1/4 tsp of Garlic Powder
1/4 tsp of Old Bay Seasoning (I didn't have any so I omitted this ingredient. Would probably taste even better with this)
2 TBSP of Kraft Parmesan Style Grated Cheese (I used reduced fat)

Directions:
*Preheat oven to 425.
*Wash and cut potatoes into 1/8ths.
*Place on a cookie sheet that has been lined with foil (You can use Reynolds Release foil so that they will not stick, but you could also either use non-stick cooking spray or lightly grease the top of the foil with extra virgin olive oil. Soooo important to do this! Otherwise, they WILL stick).
*Mix all of the spices and the parmesan cheese in a small bowl.
*In another large bowl, place all of the potatoes (remember we are talking about one pound at a time) and add olive oil and the parmesan cheese/spice mixture to the bowl.
*Coat all the potatoes with the seasoning.
*Once thoroughly coated dump onto the prepared cookie sheet and spread in a single layer.
* Bake 30-45 minutes or until tender and lightly golden brown. (Baking times will vary depending on the amount of fries that you make and the size that you cut them).
Here's the before:
And the after:
Consensus: Pretty good. I think had we had Old Bay, they would have been better but I plan on still make these again. Even if we don't have Old Bay.

Monday, January 9, 2012

Sock Bun Fail!


Aren't those curls beautiful! I mean, really! Who wouldn't want curls like that? And it's supposedly super easy! Well, I must be doing something wrong because this was the second attempt I've tried this and both times didn't work! It was an absolute FAIL! I really really want to learn how to do it. I'm hoping it's not my hair! Sigh. I will keep attempting until I either get fed up or I actually get it!
(sad, huh?)

Saturday, January 7, 2012

Boho Maxi Dress


Super cute, right? I thought so too. So my sister and I headed to the fabric store, got out stuff, headed home, and made it the same day! It probably only took the person who blogged about this dress only 20 minutes. It took us about 2 1/2 hours! We were a little picky on the sewing portion and actually pinned it.

Boho Maxi Dress
1 4/5 yard light jersey knit fabric (we got 1 7/8 because it was easier)

That's it! That's right! In the tutorial, she added a trim but that was because she cut it too short before she washed it. You don't have to do a trim. She also used dye. We just bought colored jersey knit!

Other thing we did differently, we pinned it (like I said before) before we sewed it. Also, after cutting the neck and sleeves, we re-sewed (is that a word?) the seams where we cut so that they would come apart. If you want the tutorial, go and jump on over to her post!
And here's how our photo shoot went.
Me by myself
Me and my sister trying to be like those other blogs where they pose all cool.

Us not taking ourselves very seriously though.
This jumping picture is so funny to me! My sister looks like she isn't jumping! She's just so calm! And what my hair would look like if it had more body in it.
And what I imagine I'd wear with it for the winter. I really want to find a cute denim jacket. I think that'd look really good with it.

Sunday, January 1, 2012

What to do with Holiday Cards

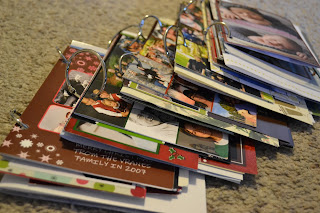
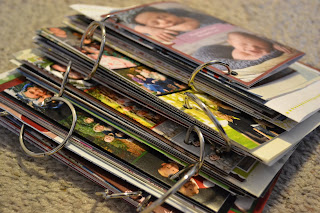
I had so many Christmas cards from years past and I had no idea what to do with all of them. They were all over the place! I didn't have any way to organize them until this year. I saw this pin and had to do it, like ... that day!


I got all my cards together from many different places and put them into each year. I then poked 2 holes in each card/letter. I put the hoops through and wahlah! Finished! The husband was going through them and commented how fun it was to look through all the cards. Mission accomplished.